how to change the wireless network name (SSID) in the network router
A network router is an important part of the home network. Although it is not strictly essential, it is an important to have a network router if you want to use multiple devices or for wireless access and for security.
All network routers come with a predefined name for the network. You do not have to change these names unless you want to. But predefined names can be hard to remember and harder to identify from the list if everybody uses the pre-defined names.
The network name is also referred to as the SSID or *S*ervice *S*et *Id*entifier. It is this name or identifier that is used by other devices to connect to the router and use the network connection. The router identifies itself to other devices that are within the range using this name, which allows other devices (such as smart phones) to auto-magically connect to the router when it gets in the range.
The easiest way to change the network name is using the router web interface. You can access the router interface from any of the devices that is physically connected to the router. This will usually be the desktop computer or a laptop. You will need the IP address of the router in order to access the web interface. It is also known as the Gateway IP address.
In Windows
You can find the gateway address in Windows by using the ipconfig command. Open a command prompt window (the DOS prompt) by using cmd command and then execute the ipconfig command at the prompt.
In the output look for the field named Default Gateway. You can also get this address from the Windows Config Panel by viewing the network properties.
In Linux
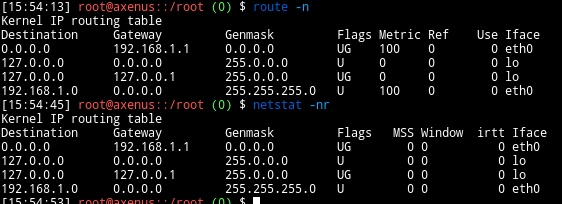
You can easily find the gateway ip address using either the route or the netstat commands. At the command prompt, enter the route command with the -n command line option. You can also use the netstat command with the -nr command line option.
$ route -n
Or
$ netstat -nr

Once you know the router address, you can access the web interface using a web browser. The typical web address is something like http://gateway-ip-address/ (for example: http://192.168.1.1/). If the network router has been configured before (custom configuration), then it might have a different slightly different configuration such as SSL being enabled or a different port number etc.
Some of the common default IP addresses for the popular brands are
- DLink or Netgear: 192.168.0.1
- Linksys, 3Com, Asus: 192.168.1.1
- Belkin: 192.168.2.1
- Apple: 10.0.1.1
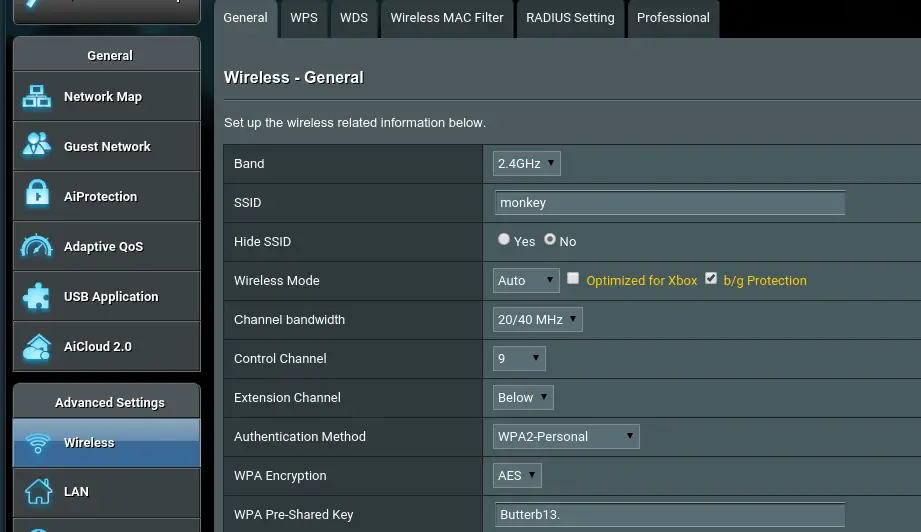
Once you have successfully logged into the web interface, you might have to look around for where the name or SSID can be changed. It depends very much on the particular brand of the network router and the interface version you have. Unfortunately there is no single unified interface that works across all browsers…
You will usually find the wireless network name or SSID under the Wireless or Wi-Fi section of the interface. For Asus routers, refer to the screenshot below. It will be very similar for other interfaces as well.

Most modern routers have support for multiple networks. There will be a network for each of the supported bandwidths: ideally 2.4GHz and 5GHz. There might also be separate network for guests. You can provide different names for each of these networks. Some routers allow you to provide the same name for all the networks, and the client will ideally choose the best connection.
Once you have found the field to change, enter the new network name and click Save or Apply button. This will usually cause the router to apply the new configuration changes by rebooting the router. You might need to wait a couple of minutes for it to restart and load the new configuration.
Once the network router has been restarted, you can verify the new network name by using a wifi enabled client device such as a smartphone or your wi-fi enabled DVD player. You should see the new network names in the list of available networks.
If you had any devices that connected using the previous network SSID, then you will need to re-configure those devices using the new SSID.
